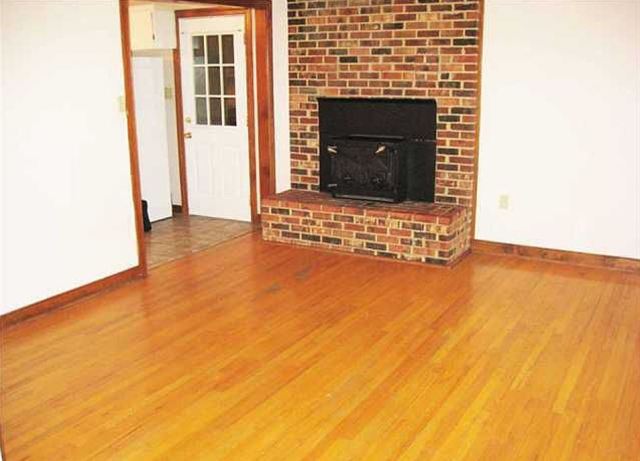
When we first looked at our new house, one of the things we loved about it was the fireplace. We are big fans of using the fireplace to assist with heating the house in the winter. We had a nice fireplace in our rental house that we used every single year and it not only provided warmth, it also helped us save on our heating bills, and looked so inviting when you came into the house. The fireplace in the new house had a really neat “Timberline” insert which we also loved. Having an insert should allow for the wood to heat up better and the built in dampers also allow you to control the airflow for a better fire.

While I loved the fireplace itself, the dark brick bothered me, especially with all of the oak colored wood on the floors and the trim. Eventually I painted all the wood trim white, and the walls butter yellow (well, until I painted the walls gray), but the brick on the fireplace stuck out like a sore thumb no matter what color the room was.
Like all of my home projects, I started looking at Pinterest for some inspiration for the fireplace. I looked at covering the brick…..

Painting the brick……

And white washing the brick (my Dad sent me the link to this AWESOME fireplace makeover)

DH wanted to leave the brick as it was (which I just could not understand why) and I was leaning towards completely covering the brick with wide wood planks.
That amazing thing called COMPROMISE happened AGAIN (this is probably why we are still married) and we decided to white wash it! Another thing that most of my projects have in common is that when a decision to do one is made, they must start immediately, so I walked out to the garage, grabbed painters tape and a gallon of leftover white paint and we got started!
We had to dust the brick pretty thoroughly (2 large dogs and 3 kitties create a lot of hair bunnies that can get into the most interesting areas of the home), but other than dusting, there wasn’t a whole lot of prep work to be done. I taped off around the wood insert and I taped off around the trim. I hadn’t painting the shoe moulding or the crown around the fireplace yet because we didn’t know exactly how we were approaching it, but since we decided, I also took the opportunity to paint that trim white too.
As far as the whitewash goes, it was very simple. You just mix some white paint and water 50/50 (or less or more depending on how WHITE you want the brick), grab a paint brush and start painting/dabbing the brick. We did 1 just to start so we could decide how white we wanted it. I had to push the bristles of the brush into the brick to get it to soak in correctly, and then wipe off the excess (it is pretty wet since it is 50/50 with water). Once DH and I agreed to the coverage, it was off to the races.
I highly recommend 2 people for this project. While you could definitely do it by yourself, it would take a lot more time because you would have to stop after every few bricks and wipe them down and then paint and them wipe….with 2 people, I could paint and DH could wipe. He put a little muscle into the “wiping” part because we were going for not so much coverage and we wanted the brick to look really aged.
It looked REALLY white when we first did it, but we underestimated how porous the brick was, and it soaked in more the longer it sat. I know that made DH a lot happier!

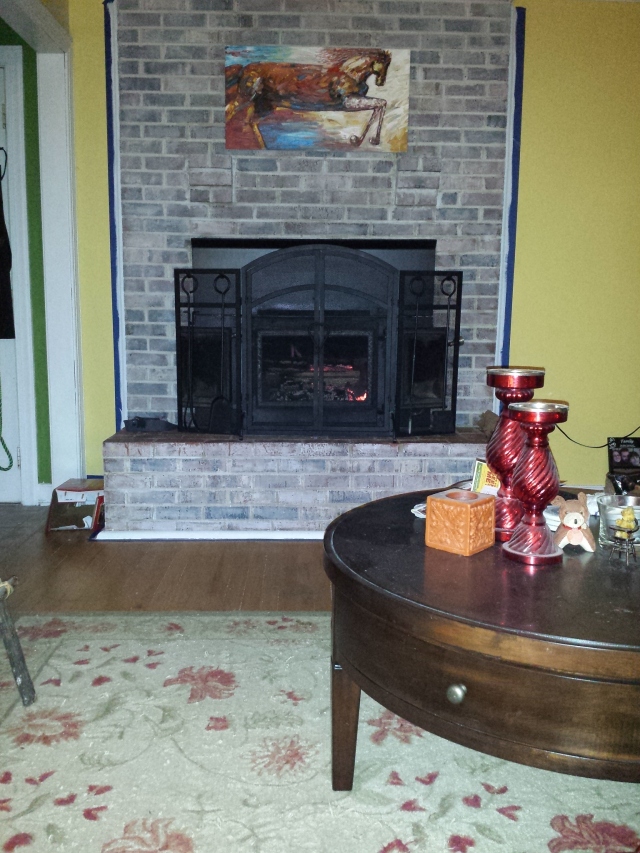
As you can see in the picture above, we were REALLY ansty to get a fire going. We did this project during the winter (before the new windows went in) and it was very chilly in the house. The brick was dry to the touch pretty quickly due to its porous nature, and after a day or so, it soaked in even more and we ended up with this:
Because we were using the fireplace as a heat source, we held off on white washing the hearth bricks. We planned on doing that when the wood stove went into hibernation in the spring (yet I type this in summer and it is still not whitewashed, oops).
Eventually we got rid of the yellow too and the new color made the white wash look even better!
All in all it made me dislike the brick significantly less. The only thing that we can’t figure out now is why on earth the builder added supports for a mantle but never put one in?!?!?! We aren’t sure what to do about that because the mantle supports are so high due to the height of the hearth that anything on top of them would leave a silly 2′ space which isn’t enough (attractive) room to do anything with.
Feel free to toss out some ideas for the mantle and let me know what you think about the white wash!


Mantle idea:
Instead of doing one long mantle, do a square platform on each on the supports. Add big statement candles or hurricane lanterns–maybe something with wrought iron to accent the “stove” portion of the fireplace.
LikeLike