The Story of Echo

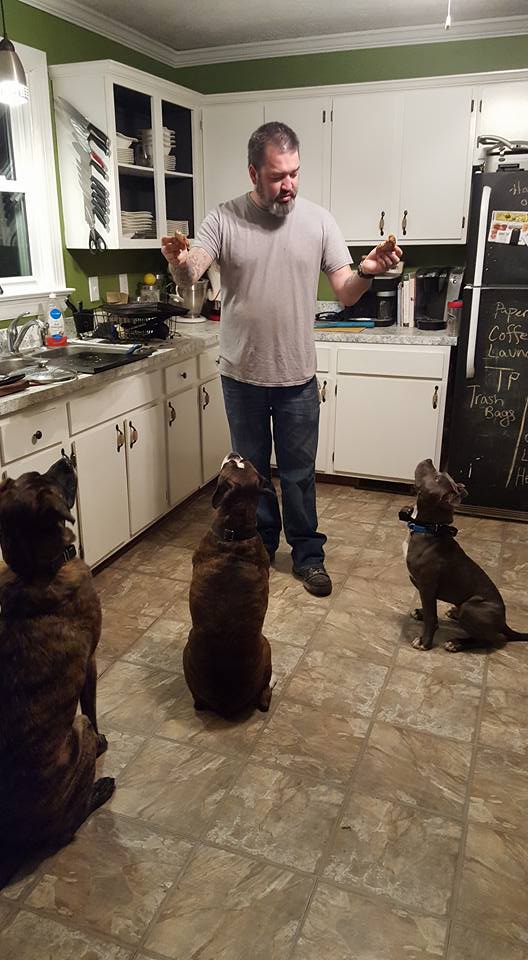
I would like to tell you a story, a story about how we ended up as a 3 dog household after I SWORE I would NEVER have more than 2 dogs at a time.

3 Dogs Couch
From left, Lucy, Moxie and Echo

Our neighbor (whom we shall call Bob for story telling purposes) has 2 beautiful pitbulls, Ruby and Red. It was right around Christmas time and DH and I decided to help Bob out by contacting a local rescue group to see if they could provide a larger kennel for Bob’s dogs since they were outside all day long, rain or shine, and shared a very small kennel. The group offered to reach out to Bob, but we wanted to talk to him first.

Ring Dog Rescue – Richmond, VA

It was 2 days after Christmas when we approached him and got some very surprising news. He was happy to hear the rescue group wanted to help. but now he had other issues. Ruby gave birth to 10 puppies the day before Christmas. By the time Bob noticed, it was Christmas morning and Ruby had smothered 5 of her puppies. He moved Ruby and her remaining 5 puppies into his garage. We checked in on them and noticed 2 of the pups were much smaller than the others, so DH and I decided to take them home and bottle feed them because Ruby wouldn’t feed them or go near them.

I still struggle to tell this part of the story. The 2 puppies that we tried to bottle feed both passed away a few hours later. I have lost 2 pets in the last 3 years but the grief I felt after losing those two babies at only 3 days old hit me incredibly hard.

Bob was working lots of odd hours during the first few weeks that the remaining 3 puppies were there, so DH and I told him we would help take care of them. We fed Ruby and Red, we cleaned the pups when Ruby didn’t, and we were the ones who eventually weaned the pups and switched them to hard food. When they were old enough (and weaned) we started taking them down to our house where they could stay warm since the garage Bob had them in was un-insulated.

Echo 3 weeks
Echo at 3 weeks old

This is where things went sideways. We would tell Bob we had the puppies while he was working 12-16 hour shifts…but then we wouldn’t hear from him for up to 4 days at a time. That happened multiple times, all the way up to when the puppies were old enough to be adopted out.

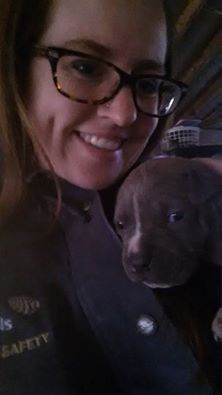
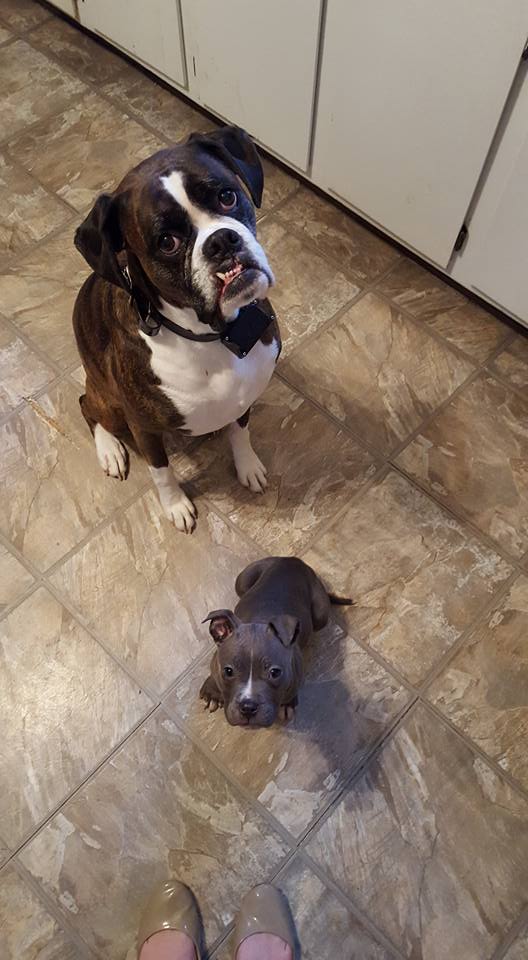
I had already named the puppies when they were 3 weeks old. You had Daisy, the big bully, Sergeant, the tiny and calm pup with the old soul, and Echo, the hyper party pup. Echo looked exactly like one of the puppies that passed away, so I though it was a fitting name.

Lucy Echo

When the pups hit 8 weeks old, Bob found a home for Sergeant. Daisy and Echo were still hanging out, and DH had become especially attached to Echo. A few days after Sergeant left, Daisy got a new home as well.

A week went by and we noticed that Echo was on a lead tied to the tree in Bob’s yard with a kennel and a bowl of water next to it. I was floored. In my opinion, he didn’t give his 2 full sized dogs enough space, and now he had decided to KEEP Echo. What made me even more upset was when we talked to Bob and he mentioned even keeping Echo and BREEDING him.

DH and I went home and had a long conversation about what to do. We knew Bob had a long shift coming up at work, and we knew Echo would be left outside. We decided to tell Bob we would keep Echo in our house until he came off his shift. Bob agreed, and we didn’t see him for another 2 weeks.

2 weeks. We had his puppy for 2 weeks with little communication. It was the straw that broke the camel’s back.

We finally convinced Bob to come talk to us, and after about 45 minutes, we learned two things. The first, the rescue group HAD reached out to Bob, and they got Ruby and Red fixed! It was great news. The second, he agreed to surrender Echo to us. It was a hard decision, you could tell he was attached to Echo as well, but in the end, it was the best thing we could have done for the puppy.

So there you have it. That is how we went from a very happy and calm, well balanced 2 dog house to a crazy, unhinged 3 dog house, and I wouldn’t change it for the world.

3 Dogs

Times Have Changed.

6 months has changed a lot. DH still isn’t working full time, but I received a pretty awesome promotion to offset the income.  We chugged along and started to whittle down the debt. We actually ended up paying off some significant depth and getting much better control of our finances. Suddenly we realized we had some money cleared up but we really needed to get a truck since we are still landscaping and hauling trash to the dump. We have had a friend for the last few months that has been wonderful enough to loan us a truck, but we were ready for our own. After much number crunching, we made the decision to buy our own pick up. After much looking, and a few test drives, we would like to introduce Millie, our 1959 Chevrolet Apache!!!!!!

Millie has been the ONLY Auto purchase that I have made with no buyers remorse. The wonderful couple that we bought her from have been a bright spot in a very dark time in our lives. I’ll be honest, we plan on doing a lot of work to Millie. We have a suspension on order and an AMAZING friend to help us put it in. That should fix the steering issues and inability to go over 55mph. We are going to replace outside handles, locks, mirrors, repaint bumpers and the grille, fix window seals, and (very far down the road) repaint her from top to bottom.  All in all, she’s a great addition and we are sooooo happy to have her!!!!

Oh….and another change. We got another dog. Yep, another one. I know, unexpected. I’ll post again soon with the story of Echo. 

Sorry I’ve Been Quiet…..But Now We Have a Sidewalk!

Hey everyone!  Sorry it has been so long since I have posted anything!  Life got a little wonky for a while there, and I did no projecting.  I know, I can hear the gasps of shock and then crickets chirping.  No Projecting.

That is, however, all changing now that we are in the most awesome season EVER!!!!!!!!!!!!  FALL IS HERE MY FRIENDS!!!!!!!!!  Yes, that means my boots came out, along with my scarves and my need for all things fall for the front porch.

wpid-img_20150926_182343.jpg

My ginormous pumpkin was purchased at Sam’s club for only $10!  Unfortunately, I went back a couple days ago to get another one and they were all rotten 😦

Anyway, so back to FALL!!!!!!!!!!!!!!!!!   I had put off quite a few outdoor projects until fall because the temperature directly affected them.  The main project that I put off was our sidewalk.  Some of you may have noticed in previous pictures of our house, there is only a small concrete pad at the base of the front steps, and no sidewalk connecting that pad to the driveway.

cropped-wpid-20150507_1555012.jpg
Notice the lack of sidewalk?

Oh yeah……and speaking of the driveway…….guess who got a NEW FRESHLY GRADED AND GRAVELED DRIVEWAY?????????????

wpid-20150924_160550.jpg
That is what 28 tons of stone looks like.

wpid-20150924_160402.jpg

You know you are getting older when things like a refreshed driveway give you the same excitement as Christmas or buying a new car.  So, back to the sidewalk…

We tossed around a lot of different ideas when it came to the sidewalk.  We thought about using brick, but that got very expensive very quickly, as did slate.  Actually, all the things we looked at were stupidly expensive for the length of the sidewalk.  It wasn’t until our friend Jay told us about Quikrete Walk Maker that we knew exactly what we were going to do.

The Walk Maker is this nifty mold that you just throw on the ground, shovel concrete into it, and then pick it up and WA LA! It looks like stone, or brick or pavers or whatever pattern you choose!  We decided to use the “Country Stone” because we are leaning towards a more rustic farmhouse feel.

Walkmaker

We began the process in Spring/Early Summer 2015, but before we could start pouring concrete, we had to buy concrete…..LOTS of it.  I waited until there was a holiday sale (Memorial Day I believe) and got 60lb bags of Quikrete for about $2.50 a bag, and then I took 2 trips to Home Depot to pick up all 42 bags. Like I said, a LOT of concrete.

We marked out where we wanted the sidewalk to go, and then, very slowly, we dug out a path approximately 2 inches deep, and 4 feet wide.  The Quikrete mold is 2′ x 2′ so this would allow up to do two of them side by side for the full length of the sidewalk.

wpid-20150531_142958.jpg

wpid-20150531_165731.jpg

Once the path was dug, I grabbed the wheel barrow, mixed up one bag of concrete, filled the mold, and then immediately drove back to Home Depot and rented the concrete mixer.  Mixing concrete by hand is no joke and each one of these molds holds 60-80lbs of concrete.  Once the mixer had been attained, the work moved slightly faster, but it was still a slow process.

wpid-20150606_120139.jpg

wpid-20150607_074527.jpg

When we got half way down the path we dug, DH decide he wanted the path to flare out, which I agreed would look really nice.  That added about 30 more bags of concrete, so we knew there was no way we would finish the sidewalk in one weekend.  We went as far as we could (physically and emotionally) go, and then called it quits until we could get more concrete, and until the temperatures weren’t so darn high.

wpid-20150607_143610.jpg

wpid-20150606_165913.jpg
It was HOT and concrete is HEAVY!!!!!!!!!!!

We waited until another sale (Labor Day) when concrete went back on sale, and I picked up another 13 bags, but this time they were 80 lb bags.  We waited for the temps to go down (and Hurricane Joaquin to go out to sea) and then picked up where we left off.

wpid-20151010_135141.jpg

wpid-20151010_135158.jpg

wpid-20151010_165754.jpg

DH was such a trooper with round 2.  Those 80 lb bags were a beast to handle.  I think in 2 days he carried over 1,800 lbs of concrete from the garage to the mixer and from the mixture to the forms.  I used a hand trowel to pack the concrete into the forms, and smooth out the top, and then the form immediately gets lifted off.

Because we did the flare at the end, it took some finagling (sp?) to make the curves.  Essentially, we would pour one mold, then pick up the mold, and cut into the one we just poured to change the angle.  This meant the entire flare has many different sized stones that looks nothing like the mold.

After all of our hard work, we were almost done……until we realized we were 4 bags short.  4 bags.  I couldn’t believe it.  We had to return the mixer, so unfortunately the 4 bags did not get poured and the sidewalk it still unfinished, but we are 95% there.  We will be using a small pea gravel to fill all the spaces in between the stones, and the sidewalk will also act as a run off system for heavy rain to help dissipate it when it comes down the property.

The sidewalk was by far the most physically difficult project that we have done in the house thus far. The pure volume of concrete needed and the weight made it a daunting task and not one for the faint of heart, but no matter what, now we have a sidewalk!

wpid-20151011_164336.jpg

Butt Sharks and Water Stags

I haven’t been doing much writing lately.  Projects that I can DIY are becoming fewer, and the budget is decreasing as DH changed jobs and we are adjusting to a new pay cycle.   I’m not too bothered by it.  The down time has allowed me to actually live in my house instead of constantly scuttling through it, never focusing on the big picture.

I actually LIKE my house now.  It took me a long time to say that.  I am not sure what exactly caused me to have so much buyers remorse, but I had it hard core.  That is probably (in part) why I dedicated the first year and a half in the house to “fixing” it.  “Fixing” happened for two reasons:  necessity (dryer vent not properly connected, porch posts rotted, windows replaced, etc) and my own sanity (removing wallpaper, painting, purdifying, etc).

Pinterest is the devil, have I mentioned that?  So many projects, so many ideas, so many “your house will NEVER look like this but I know you will try and do it anyway and make DH hate you for forcing him to try to cut crown moulding 20 times and screw it up each time and then vow to NEVER put crown in the navy blue powder room even though you didn’t tape the top of the walls because you figured you were going to cover it with crown and now you have to look at it every day and cry a single tear at the speckles of navy blue on the ceiling”.   Damn you Pinterest.  Damn you.

I took a break from fixing.  I spent time with actual people. I went to Milwaukee for a week for work and met some awesome people (aka drank lots of beer with strangers and became friends with them).  We took a trip to Seattle to see my little brother get married.

Bro and Sis

wpid-20150716_145709.jpg

We drove 3 hours to see a high school friend that I hadn’t seen in 13 years and  went tubing on the Shenandoah River. I learned about Butt Sharks (rocks in a shallow river that will have their way with you when float over them in a tube) and Water Stags (dangerous sticks and branches that hide below the surface of the water, quietly waiting to murder your tube).  Nature!

wpid-20150808_160841.jpg

After taking so much time to focus on life instead of the house, I came to the realization that there is only so much that I can do on my own at this point.  There is a lot that still needs to be done, but I have accepted that it will need to be done by professionals.

-Fix, grade and add new gravel to driveway

-Install 350′ chain link fence for the dogs

-Take down walls in the house

I’m toying with the idea of applying for a HELOC and killing all of the birds with that stone.  Taking down the walls, replacing all the flooring on the first floor, gutting and renovating the kitchen, repairing the driveway, installing the fence, fixing the back deck.  I want it all done, but I am getting nervous.  I am going into really uncharted territory here.  I have gotten quotes/estimates on some of the items and HOLY COW it is adding up quick.  $5k for a fence, $1200 to fix the driveway, $12k for a kitchen, $3k for flooring, and I have no clue what it will cost to remove the walls and add header beams (and rerun the electrical, fix the drywall).

My blog is changing, morphing.  It is still a journey through homeownership, but my DIY phase is slowing ending, and the professional overhaul is looming overhead.  It’s scary, but there is one thing that keeps me going……

FALL IS COMING!!!!!!!!!!!!!!!!!!  Pumpkins and boots and scarves, oh my!

That Time We Whitewashed the Fireplace

When we first looked at our new house, one of the things we loved about it was the fireplace.  We are big fans of using the fireplace to assist with heating the house in the winter.  We had a nice fireplace in our rental house that we used every single year and it not only provided warmth, it also helped us save on our heating bills, and looked so inviting when you came into the house.  The fireplace in the new house had a really neat “Timberline” insert which we also loved.  Having an insert should allow for the wood to heat up better and the built in dampers also allow you to control the airflow for a better fire.

 Fireplace
Fireplace picture from the house listing

While I loved the fireplace itself, the dark brick bothered me, especially with all of the oak colored wood on the floors and the trim.  Eventually I painted all the wood trim white, and the walls butter yellow (well, until I painted the walls gray), but the brick on the fireplace stuck out like a sore thumb no matter what color the room was.

Like all of my home projects, I started looking at Pinterest for some inspiration for the fireplace.  I looked at covering the brick…..

Painting the brick……

And white washing the brick (my Dad sent me the link to this AWESOME fireplace makeover)

http://www.theyellowcapecod.com/2012/03/white-washed-brick-fireplacetutorial.html

DH wanted to leave the brick as it was (which I just could not understand why) and I was leaning towards completely covering the brick with wide wood planks.

That amazing thing called COMPROMISE happened AGAIN (this is probably why we are still married) and we decided to white wash it!  Another thing that most of my projects have in common is that when a decision to do one is made, they must start immediately, so I walked out to the garage, grabbed painters tape and a gallon of leftover white paint and we got started!

We had to dust the brick pretty thoroughly (2 large dogs and 3 kitties create a lot of hair bunnies that can get into the most interesting areas of the home), but other than dusting, there wasn’t a whole lot of prep work to be done.  I taped off around the wood insert and I taped off around the trim.  I hadn’t painting the shoe moulding or the crown around the fireplace yet because we didn’t know exactly how we were approaching it, but since we decided, I also took the opportunity to paint that trim white too.

As far as the whitewash goes, it was very simple.  You just mix some white paint and water 50/50 (or less or more depending on how WHITE you want the brick), grab a paint brush and start painting/dabbing the brick.  We did 1 just to start so we could decide how white we wanted it. I had to push the bristles of the brush into the brick to get it to soak in correctly, and then wipe off the excess (it is pretty wet since it is 50/50 with water).  Once DH and I agreed to the coverage, it was off to the races.

I highly recommend 2 people for this project.  While you could definitely do it by yourself, it would take a lot more time because you would have to stop after every few bricks and wipe them down and then paint and them wipe….with 2 people, I could paint and DH could wipe.  He put a little muscle into the “wiping” part because we were going for not so much coverage and we wanted the brick to look really aged.

wpid-20141121_182728.jpg

It looked REALLY white when we first did it, but we underestimated how porous the brick was, and it soaked in more the longer it sat.  I know that made DH a lot happier!

Fresh whitewash with painted trim
Fresh white wash with painted trim

As you can see in the picture above, we were REALLY ansty to get a fire going.  We did this project during the winter (before the new windows went in) and it was very chilly in the house.  The brick was dry to the touch pretty quickly due to its porous nature, and after a day or so, it soaked in even more and we ended up with this:

wpid-20141122_1927230.jpg

Because we were using the fireplace as a heat source, we held off on white washing the hearth bricks.  We planned on doing that when the wood stove went into hibernation in the spring (yet I type this in summer and it is still not whitewashed, oops).

Eventually we got rid of the yellow too and the new color made the white wash look even better!

wpid-20150228_153327.jpg

All in all it made me dislike the brick significantly less.  The only thing that we can’t figure out now is why on earth the builder added supports for a mantle but never put one in?!?!?!  We aren’t sure what to do about that because the mantle supports are so high due to the height of the hearth that anything on top of them would leave a silly 2′ space which isn’t enough (attractive) room to do anything with.

Feel free to toss out some ideas for the mantle and let me know what you think about the white wash!

The porch is becoming pretty!

We are finally past most of the structural/integral upgrade to the house!  Seriously…..HVAC, done. Water Heater, done.  Windows, check!  Porch support repairs, yup!  Roof replacement, done.  So it is finally time to give the house a little bit of curb appeal and superficial love!  (aka, decorating and fru fru).  I like using technical terms.

Making the front porch structurally sound was the absolute most important thing to do, and we accomplished that.  Since the porch was now safe to use, we noticed that we wanted to use it more, and the flow on and off the porch just wasn’t working so well.

We have a cinder block fire-pit (built out of blocks found in the woods near our house….so FREE) that sits in our backyard to the left of the house (opposite from the garage).  I noticed that we used the front porch to go in and out of the house a lot more than the back door when we have a fire going, so I decided we needed a second set of steps coming off the side of the porch so you didn’t have to walk around to access the steps in the front every time.  Enter hammer and aggression eliminator.  10 minutes later:

wpid-20150329_163249.jpg

wpid-20150326_165849.jpg

Man it felt good to open up that side of the porch.  Even our neighbor pointed out that he didn’t understand why no one had done that sooner.  We added some steps a couple of weekends later and ta da!  A second access point to the porch!  We still need to add railings and risers, but the stairs function, and that is all we need right now.

wpid-20150505_181951.jpg

About a week after I removed the railing, Home Depot had a sale on Boston Ferns, a staple for any southern porch.  At $5 a piece, how could I NOT get 6 of them for the porch?

wpid-20150507_155533.jpg

After building the side stairs we realized how bad the front steps were because we were going up them so often, so we decided those needed to be replaced.  We were so glad we made that decision because termites had demolished the railing on the steps and the stringers themselves, and I won’t even get into how poorly the stairs were built (yet another “Are you serious?” moment brought to you by the House of Porch).

wpid-20150508_191056.jpg

wpid-20150508_192451.jpg

Once we get the new stairs all purdified (technical term) I will add some pictures.  It took us a while to figure out the correct way to install the new stringers because a pre-cut 2 step wasn’t tall enough and a pre-cut 3 step was too tall (and cutting our own wasn’t going to happen).  We adjusted the 3 step by cutting down the bottom step, and it worked!  Yay for stairs that you are not afraid to go up!

Next I moved on to the uber dirty white-ish vinyl beadboard on the ceiling of the porch.  We had a horrible infestation of wasps this year, and there seemed to be something about the porch that they just LOVED.  A quick Help/Vent on Facebook and someone suggested that painting the ceiling blue like the sky gets rid of bugs.  I wasn’t sure I believed it, but a quick Google search and I understood why my friend thought this.

Long story short, the people of the Gullah islands off the coast of South Carolina thought the blue color would keep vengeful and evil spirits out of and away from their homes, so they painted the trim and ceilings of porches a pale blue that they called “Haint” (haunt) blue.  The paint was a traditional milk paint that had lye in it which would keep bugs away, thus the old wives tail about the color confusing the bugs (color for ghosts, lye for bugs, time lost some detail).  Modern paint doesn’t have lye, but the practice of painting the ceilings was so widely used that it became a tradition.  And a blue porch ceiling is just pretty…and southern!wpid-20150429_175254.jpg

wpid-20150428_180210.jpgwpid-20150428_180221.jpgwpid-20150505_181300.jpg

I have to throw this in – painting that damned bead-board ceiling was one of the most tedious pain-in-the-butt projects I have EVER done.  Hindsight is 20/20 and if I had to do it again, I wouldn’t, I would remove all the bead-board from the ceiling and paint it in the garage.  Painting in all the little grooves upside down almost drove me mad. In the end, I didn’t do a full 2nd coat, and if you look, you can see some of the spots that definitely need it, more specifically around the edge where I had to cut in by hand.  Never. Again.  We bought a Paint Sprayer.

Because I have lost the ability to be bored in any sense of the word, as soon as the ceiling was painted, we had the windows installed, and then I made a new wreath for the front door, but I couldn’t stop there.

wpid-20150512_200814.jpg

None of the decking or railings on any of the porches attached to the house were ever sealed.  We got a can of Behr Semi Transparent Waterproofing and Sealant and after a thorough cleaning of the deck boards, I stained them….with a brush.  The roller just did not look very nice, and I was terrified of using the paint sprayer in a confined space by myself.  The prep seemed too overwhelming so I sucked it up and 48 hours and two coats later, the deck was sealed!  The railings will eventually be painted white (and yes, we will use the sprayer for that) but for the time being, the sealed boards made a huge difference!

wpid-20150514_175116.jpg

wpid-20150514_171847.jpg

wpid-20150514_183510.jpgwpid-20150516_153128.jpg

It was at this point that I got a huge surprise at work.  A co-worker from our NYC Branch nominated me for, and I was awarded an “Above and Beyond” recognition….and bonus.  A BONUS people!!!!!!!!!!!!  My FIRST BONUS EVER!  It took me all of 1.86 seconds to know exactly what I was going to do with that bonus and that is how these GORGEOUS teak rocking chairs came to be on our porch!

wpid-20150521_191638.jpg

Word to the wise:  after spending hours and hours and hours hand painting/staining a deck, do NOT put rocking chairs directly onto the wood.  5 minutes after sitting in one of them I could see the stain being damaged.  For this reason, project # 4,597, rugs to go under the rockers for cuteness and to protect the decking.  Through Pinterest and this blog http://lessthanperfectlifeofbliss.blogspot.com/search?updated-max=2012-06-08T08:16:00-04:00&max-results=7&start=10&by-date=false   I purchased a very inexpensive rug, cut it in half, slapped some paint on it and ta da!  Here is the before and after!

BEFORE
BEFORE
wpid-20150531_182442.jpg
AFTER! (Pardon how dirty the rug is, I took this picture while in the middle of another project that I will post about later on. It involved dirt if you can’t tell).

So there you have it, a run down of the gazillion things I have accomplished so far this spring/summer, but the season is still young and as you know, I don’t do bored well. Thanks for reading!  If you have any feedback or DIY ideas, feel free to let me know!  I’m always open to new project ideas!

The Window to my Soul…..Kind of.

Ok Ok OK I cannot hold it in any longer.  WE REPLACED THE WINDOWS!!!!!!!!!!!!!!!

Replacing the windows in the house has been in the plans since the day we signed the dotted line on a 30 year mortgage.  We considered doing it in 2014 and even met with 2 contractors to get pricing.  The quotes couldn’t have been farther apart from each other.  We had 19 windows we were looking to replace.  One contractor quoted around $6,500 (this did not include 3 windows in the garage or the sliding patio door that desperately needed replacement).  The 2nd contractor quoted $25,000 (ahem, ANDERSEN). It took a LOT of self control not to laugh in his face in horror when he told us the price.  While the windows he showed us were gorgeous and very high quality, I just could not even consider $25,000 for a single project in the house.  We would never even recoup half of that in resale, so he was out.

It was then that I began painting every room in the house, and then we sporadically bought furniture.  My budget for windows was gone, and the following 12 months were agony.

Go figure we would have one of the COLDEST winters Virginia had seen in a long long time, and the existing windows were showing us just how bad they were.  The drafts coming through the windows were bad.  The wind coming through some of them that were not even fully closed when they were painted on the outside was HORRIBLE.  We went through lots of clear packing tape sealing up the gaps (some of which were up to 1/4″) to try to keep the heat in.  It was minimally successful at best.  Our $400 power bills were proof of that.

By January 2015, Frank Amory of Window Depot USA of Richmond had called me as a follow up to our quote from the spring before, and I was READY.  But not quite ready.  We scheduled the appointment for April, and then my project list started growing again.  I figured, for a temporary curb appeal solution, I could paint the windows!  Get rid of that ugly burgundy!  Then I could save up some money and buy 1 window at a time and install them myself and save a ton of money!

3 days, a gallon of paint and 6 painted windows later, I gave up and moved our appointment to March.

wpid-20150322_165432.jpg

You will hear people tell you all the time, oh, window installation is so easy!  You can do it yourself! They are telling you a half truth.  Yes, taking the window out and putting a new one in is easy.  It’s everything after that which is tedious, and if not done correctly, will destroy your new windows.  The more research I did, the less comfortable I felt with a DIY on windows. Foaming, caulking, balancing, sight lines, climbing on the roof….or a 28′ extension ladder.  NOPE.

By the time Frank Amory arrived to our home, I knew what was going to happen.  It needed to happen.  We were past “want” and into “desperately needed or would fall into an abyss of insanity and hopelessness”.  He measured windows, he talked numbers, he showed samples.  2 days later I was signing a contract and getting PSYCHED.  We would replace all 19 of the windows AND the sliding patio door!!!!

We decided to go with “grids” (aka muntins) on the front windows for some added curb appeal, but I decided that grids on only the top half.  I thought it was a unique look, and it also was less expensive than grids on the full window.  This was the easy decision, then Frank dropped the ball on me.  “I’m also going to need grid patterns for the top sashes, how many panes on the top?”.  Um, you mean I have to make another decision?  Panic ensued.  This wasn’t just about my personal taste.  This was a part of the house that needed to be widely liked by all parties to ensure a good resale.

wpid-20150401_073055.jpg

I tried playing with pictures on the computer, but that wasn’t all that successful.

wpid-20150401_074447.jpg

Apparently it didn’t take Frank long to figure me out.  When I asked him how I should decide, he said “I think a glass of wine and tape is the answer!”   And it WAS!  I taped up 4, 6, 8 9 and 12 patterns in the top windows, walked out into the middle of the front yard and enjoyed a glass of wine.  DH joined me, and within 5 minutes, we decided on a 12 grid pattern for the wider windows, and a 9 grid pattern for the skinnier ones.

wpid-20150401_175633.jpg

Sadly, shortly after we ordered the windows, my excitement was marred by grief as DH and I had to say goodbye to our beloved Ben.  He sadly passed away on April 15th.

wpid-20150414_163236.jpg

About 3 weeks later (and to the annoyance of many of my co workers, family members and Facebook friends) I got myself worked up looking forward to the install.  Then the day came and it took everything in my power not to jump out of my skin.  The installation team showed up and were immediately assaulted by super-stoked-amped-hyper-OMG it’s the day-Erika.  They handled it with grace and it was GAME ON!!!!

wpid-20150506_091130.jpg

wpid-20150506_091301.jpg

wpid-20150506_095451.jpgwpid-20150506_162321.jpg

It took 1.5 days, 20 million tubes of caulk, 2 yellow jacket stings, one sadly broken nest of birds eggs (blame that on my dogs) and lots of dealing with chatterbox me, but the guys finished and made me the happiest home owner ever….because of this:

wpid-fb_img_1430948359716.jpg

wpid-20150507_173733.jpgwpid-20150507_173710.jpg

wpid-20150507_155533.jpg

I would like to say a HUGE thank you to Dana, Frank, Josh, Harley and Joe at Window Depot USA of Richmond for their time and great attitudes as well as quality service.  I highly recommend them to anyone in the Richmond, VA or Charlottesville, VA area for their window replacements.  And no, they didn’t pay me for this.  But I AM considering re-siding the house now too……oh FRAAAAAAAANNNNNKKKKKKKK!!!!!!

wpid-20150507_155501.jpg

https://www.facebook.com/WindowDepotUSARichmond

http://www.yelp.com/biz/window-depot-usa-of-richmond-midlothian-2

The Down and Dirty of Buying a Rental Home (for your home)

Throughout the renovation journey of our home, we have discovered some VERY interesting things in our home.

Let me give you a little history about our home.  Our house was built in 1994 by a man and his father.  The man worked in construction and decided to use a lot of leftover construction materials to build the house for his mother and father.  Thus, our home came into existence, wallpaper, pink paint and all.   I can only imagine that, based on the variety of wallpaper, consistency of pale pink and mint green paint (even the garage is painted mint green) and lack of general attention to detail, that the house went up fairly quickly and very inexpensively.

At some point, the father passed away, as did the son.   The mother was left with the house and decided that she wanted to move out.  I do not know if she ever attempted to sell the home, or made the immediate decision to rent the home out, but either way, renters proceeded to occupy the home until we purchased it.

Having rented for the majority of my life, I understand that as a landlord, you want to make money, not spend it. However, to do that, you need to have a product that someone is willing to pay you for, and you must be willing to maintain that product.  All too often I have dealt with landlords that question basic repairs and maintenance, and in many instances, that has turned what could have been a small cost into a major repair.  In one home, we noticed the shingles on the storage shed starting to go, and after requesting repairs for months, eventually rot and mold overtook the roof and the roof of the shed collapsed…on top of  DH’s Harley Davidson.  That collapsed shed stayed that way until the day we moved out, and that house had no other exterior storage.  We did not leave very happy.

That being said, in the same home under the same landlord, we were able to convince him to replace the windows, and our power bill went down by over half.  That is a great selling point.

The only reason I mention this is because apparently whoever the mother put in charge of our home as the landlord did not understand that cheap fixes (or no fixes) are NOT always better, or that in the long run, updates would increase the profit.  Nor did they understand that if they wanted to sell that home someday, they should probably maintain it with more effort.

The landlord for our home LOVED to take short cuts.

Here are some of the “you have got to be kidding me” things we have found so far:

1.) In the kitchen, only 1 drawer is on tracks.  Another drawer is not a drawer but a drawer front nailed to the cabinet, but there are tracks in the cabinet for a drawer.  So you are telling me you took the time to build a drawer front (the cabinets and drawers are definitely hand made and not in a good way) and you took the time to nail it to the cabinet, but adding a functioning drawer when half the mechanical parts are already existing was too difficult?  Really?

2.) The Renters smoked in the house.  It took us a while before we noticed this because I do have to give the seller credit, they did a VERY thorough job of cleaning that house.  However, they missed all the crown molding on the first floor which I discovered when prepping to paint the trim.  A little TSP and I suddenly had an orange rag in my hand.  Piece of advice (and this is coming from an ex smoker)….DON’T let ANYONE smoke IN your house, rental or owned, because no matter how hard you try, that evidence will be discovered, and it is not a pleasant discovery.

3.) Painted Windows.  At some point, someone living in that house decided that instead of replacing all the windows, they would replace the windows one at a time with whatever was the cheapest window they could find.  It didn’t matter that these sporadic replacement windows were different colors on the inside and out as the rest of the windows.  That’s what paint is for!  We have 19 windows in our house, and as of today, a year after we moved in, we have only been able to pry 8 of the 19 windows open because every window had been painted shut.  Some windows weren’t even fully closed and secured before they were painted, so we have windows that are actually painted and open.  Duct tape and strapping tape was used in abundance this past winter.

4.) The dryer was not vented outside.  Yep, you read that correctly.  Our washer and dryer are in the garage on a platform.  One day the dryer was running and when I walked into the garage, the garage was full of steam.  I looked under the platform where they sat and saw steam pouring out of the wall.  They had run the vent pipe to the wall and crushed it, then taken a piece of plywood and drilled it over the crushed pipe to secured it.  Keep in mind, the hole to vent outside was 8 inches above where the crushed pipe had been secured, but apparently hooking up the hose to the pipe was far too complicated.  Instead they caused a fire hazard.  This was the biggest WTF because DH and I went to Lowes, purchased the correct pieces and had the issue fixed in 20 minutes for under $20.  Why couldn’t a landlord do that?  $20 could have eliminated a fire hazard.  That is pure laziness.

5.) The exhaust fan in the kitchen was not vented outside.  When whatever is on the stovetop decides to send smoke signals and sing us the song of its people, the vent fan would be awesome to use….if it vented outside.  Instead, it sucks the smoke into the fan and blows it into the face of the cook….and back into the house.  Which wouldn’t be too bad, if the windows opened.

6.) No exterior maintenance on our badass wrap around porch.  Please see previous post about rotten porch posts and what could have possibly happened as a result of no maintenance.

wpid-20141203_165431.jpg

The whole point of all of this is two fold.

The first, if you are buying a home that was previously a rental property, be prepared for some “Are you serious?” moments.

And if you are a landlord, don’t be lazy with repairs.  You need to look at it this way: Would you live there?  Is it safe? Do you want to sell the property some day?   Because when you don’t take care of your properties, things like this happen:

wpid-20140105_145223.jpg

Pink kitchen counters and faux granite paint.

One of the biggest eyesores in our home (there were many, it was difficult to rank them) were the pale pink counters in the kitchen.  They weren’t even an awesome burn-your-eye-sockets-hot-pink.  I couldn’t even PRETEND to like them.  They were this weird, not-quite pepto pink, and they are laminate.  Don’t get me wrong, it’s not like the rest of the kitchen (those reeeeeeallly bad cabinets and the horrible stick on tile floor) was all that great, but the pink just had to go.

wpid-20140111_115725.jpg

DH and I decided we really liked butcher block counters, so I went gung-ho on Pinterest pinning every picture of butcher block counters that I could find, until I realized how much it would cost to totally replace all the counters.  My next step step was DIY.  “Can I DIY the butcher block?” Again, I perused Pinterest with much ferver and slowly became more and more certain that DIY Butcher block counters we out of my patience/finance/comfort zone.  (http://loraine-breakfastfordinner.blogspot.com/2011/09/faux-butcher-block-conter-top-tutorial.html)

This woman’s DIY counters are beautiful, but I didn’t have the patience to do it: http://loraine-breakfastfordinner.blogspot.com/2011/09/faux-butcher-block-conter-top-tutorial.html

I can’t really remember if I stumbled on it, or something cause me to look for it, but one evening sitting on the couch with a glass of pinot grigio in hand, I saw a picture of granite counters in the DIY section on Pinterest.  It caught my attention because I was thinking “why on earth would someone pin this to DIY?” until I looked at the post in detail and realized they were PAINTED FAUX GRANITE!!!!!!!!!!!!!!!!   They looked great, and the best part was the price:  Under $100.  I showed DH the picture, gave him a brief run down, topped it off with the price, and got the nod.  Game on.   Here was the inspiration (Click picture to go to her blog post, that kitchen redo is amazing):

I wasted no time in getting started. We decided to try lighter counters, something we didn’t see too many examples of.  I knew that some companies made kits to do the counters with a faux granite finish in a lighter hue, but I wasn’t down with spending $75-100 on the kit when I could do it for under $35 at Michaels and Home Depot.  So I headed out to the stores and purchased some paint.  I got an oil based primer that I had tinted to match this “Cream in my Coffee”  color swatch:

wpid-20150113_174858.jpg

Then I went home and cleaned, then lightly sanded all the counters.  Just a quick sanding by hand was fine.  Then I wiped all the counters down again, and taped everything off. Once taped, I rolled on 2 coats of the primer and got this:

wpid-20150113_173714.jpg

No more pink!!!!!!

Here’s where things went sideways.  I should have done more digging and research on the color scheme for light granite, but alas, I did not. I grabbed my sea sponges and some grey and tan acrylic paint (the little craft bottles from Michaels) and started going to town laying it down. And then I realized that I REALLY didn’t like it.

wpid-20150114_134322.jpg

wpid-20150114_162448.jpg

It just didn’t have that “granite” look to me.  I lived with it for a few days until I decided that I just couldn’t accept failure, and then I did even more research and realized that my first mistake was that the black of the granite shouldn’t look like it is on top of the other colors, it should look like it is UNDER them.  Soooooooo…….

wpid-20150116_204232.jpg

I started over.  I sanded down the top, and then covered it with black paint.  You might also notice in the pictures above that 2 of the cabinet doors seem to have disappeared during this process.  I decided after painting the counters black that those pretty Villeroy dishes needed to be shown off to the world, so I said goodbye to the doors, and decided to paint the inside of the cabinet.  More pictures of that process below.

We let the black cure overnight, and it was such a drastic change (and looked so much better than my failed first attempt at granite) that DH tried to convince me to leave them black.  I had to agree with him that they did look better black than 80’s bad italian restaurant beige and taupe, but I was still determined to try the granite again.  I went back to Michaels and got more paint (and some super fine glitter) and started the pattern over.

As you will find in most faux granite painting posts, the process is pretty much all the same.  Grab a sea sponge, wet it, wring it out, pick a paint color and go to town. And that really is about it.  Here are the counters with one or two passes of pure white.

wpid-20150117_120209.jpg

I had 3 different whites that I worked with.  White with a TINY bit of gray, pure white, and then pure white with super fine iridescent glitter mixed into it.  I just sponged it on until I got the coverage that I liked.  I also took some tan and mixed it with white to give the color some depth (instead of just being black and white). Here is the final result!

wpid-20150117_133252.jpg

Personally, I like it MUCH better than the first attempt.

After I let all the paint dry, I began the arduous task of topcoating.  I used a polycrylic so that it wouldn’t yellow over time.  I lightly sanded, then layer of polycrylic.  Sand, coat, sand coat….and so on.  I got a little overzealous at one point with the sander and almost had a panic attack when I saw the results.

wpid-20150119_163653.jpg

I filled in the over sanded areas with some white paint, and it blended in. Crisis averted, but after that, I put the sander away and went old school  using my hands and some 220 grit.

It was definitely a learning process, but I was very happy with the results.  Oh, and here are some shots of that random “painting of the inside of the cabinet” project that I decided to undertake midway through.

wpid-20150118_160217.jpg

And the results!!!

wpid-20150205_173329.jpgwpid-20150119_170527.jpg

I need a little touch up in the cabinets but all in all, it looks better!

wpid-20150121_184406.jpg

wpid-20150121_183137.jpg

So there you go!  The kitchen is coming along nicely.  Shortly after I finished the counters, I replaced the light over the sink with a stainless steel pendant (Home Depot) and I bought some nifty magnetic knife strips and installed them vertically on the ends of the cabinets on either side of the sink which cleared up a lot of counter space by eliminating the need for knife blocks.  Now I am no longer (completely) embarrassed of our kitchen!

The Yellow Room – Follow Up

I finally got so sick of the yellow in the living room that I sucked it up and painted it, and BOY am I happy I did!!!!  Look at this transition!!!!!

Before
Before
After!
After!

We ended up using the same color (Valspar Metropolis) so now both the living room and the family room are the same.  The yellow was just too overwhelming.  I didn’t realize how much until we started painting.  The difference with both colors on the wall at the same time was crazy!

wpid-20150228_153327.jpg

I LOVE how the gray looks against the fireplace too.  The yellow made the fireplace feel so harsh and unappealing, but the gray brings out beautiful tones in the whitewashed brick.

wpid-20150301_132449.jpgwpid-20150301_132505.jpg

You can really see how bright the yellow was in the picture above….and again, look how nice the gray is with the fireplace!

DH even jumped in to help!

wpid-20150301_132352.jpg

This makes the 2nd room in the house to be repainted twice.  Ironically enough, the first was the other family room…which was repainted to this color from a darker gray/blue.  I think I am noticing a trend in our color taste!

I still love to look at the changes…..

the 1st BEFORE

wpid-20140324_175831.jpg

The 2nd BEFORE

wpid-20141230_135532.jpg

And the final product.  Not too shabby!

wpid-20150302_171241.jpg